Jan 302014
 

One of the cool things about buying a widget from Sparkfun, or Adafruit, or Pololu is that almost invariably there is some reference software posted with the product to get you off the ground immediately.

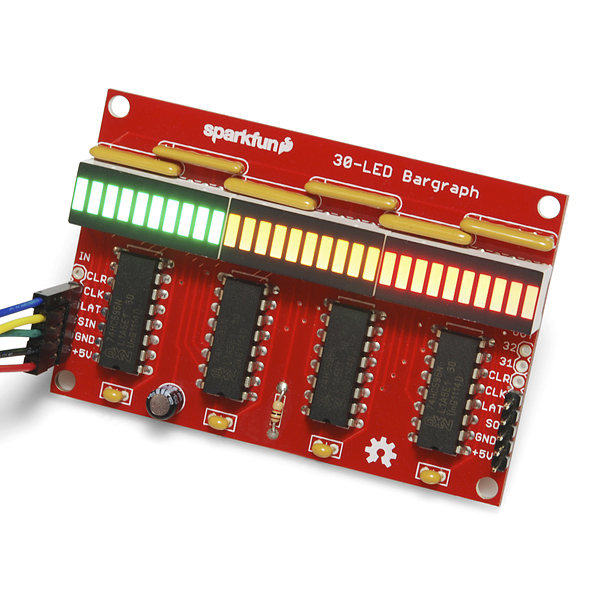
For the Sparkfun LED bargraph kit the reference code can be downloaded from the product page or directly from Sparkfun’s github repo.

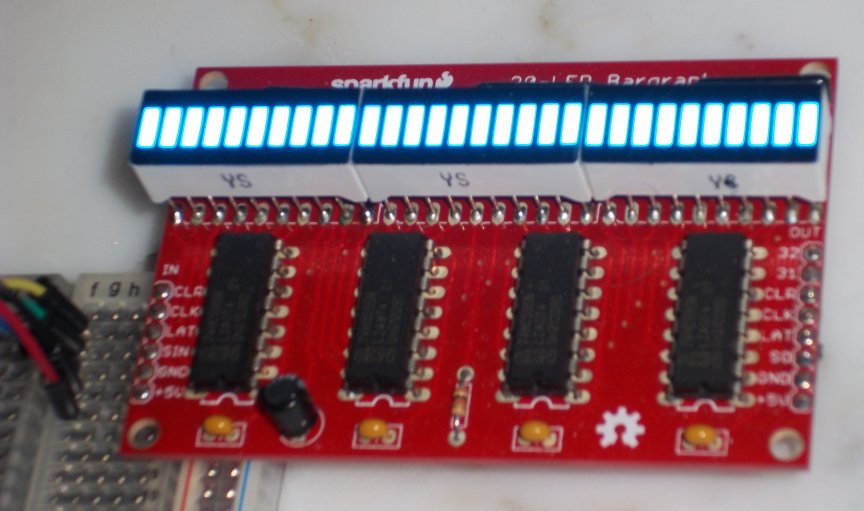
The reference software comes with examples that demonstrate multiple ways of driving the LEDs. Here are a couple videos demonstrating the setup and Sparkfun’s demo code putting the bargraph breakout through it’s paces.


This is with no additional coding. Build the LED bargraph display, wire it up to the Arduino SPI, download the Sparkfun bargraph demo library, upload the example code, and sit back and watch the light show.

A different project I am working on needs a display with the feel of an analog VU style meter. I need to monitor a continuous variable and display feedback to a user of the variables relative value between it’s min and max. It was a short step from Sparkfun’s demo code to a display just like I need.

I wrote some quick demo code to read an analog input and map the read values to a set of LEDs on the bargraph display. I forked Sparkfun’s github repo for the bargraph kit and added my additional example code. You can pull the analog input to VU meter display demo from my github bargraph repo.

Here are some videos showing the setup and display of a read analog value in bar and dot modes.


This is exactly the style of display I was looking for and I think this package is going to work nicely.

Jan 282014
 

I’m in the middle of a project that would benefit from an analog style display. Something to visualize an approximate value, within a min and max range, simply and clearly.

I like to browse Sparkfun’s inventory when I’m looking for new or interesting widgets. They are hometown boys (at least if your hometown is Boulder, CO), they make a range of interesting products, and being local it is easy to order and pickup parts the same day. And it turns out Sparkfun makes a nice LED bargraph breakout kit that looks like just what I’m looking for.

Fully assembled the display is supposed to look like this
sparkfunledbargraph
The kit consists of a carrier pcb, four 8 bit serial to parallel shift registers(74HC595), some current limiting resistor packs, decoupling caps, and three 10 position LED bargraph displays. The Sparkfun kit comes with a Green, Yellow, and Red bargraph.

The Green to Yellow to Red transitions follow the typical Ok, Warning, Danger pattern. A reasonable choice by Sparkfun given no insight into their customers final designs.

When I picked up the kit I had a different application in mind. Rather than the standard transition from ok to danger I wanted more of a VU meter or power level type of display. For my application a single color for all three bargraphs makes more sense. It turns out Sparkfun sells the LED bargraphs in Blue, which is what I wanted. Each of the four colors of bargraph, Green, Yellow, Red, and Blue, are drop in replacements for the ones in the kit so you can mix and match to get the color or color ordering you want.

bargraph_blue

Eventually I want to mount this display in an enclosure with the LEDS showing and the pcb hidden. If the board is built as you would expect, all of the components firmly seated against the PCB before soldering, the LEDs do not sit very high above the shift register ICs. That means when the display is mounted either the enclosure walls need to be thin or else the LEDs will be set back in the enclosure wall. It turns out the LED bargraphs come from the factory with pretty long legs, probably around 5 mm. If you solder the LED bargraphs with the legs just through the PCB the front of the LEDs will stand off of the PCB about 12-13 mm and a good 6-7 mm above the ICs. That should give plenty of space to mount the PCB and have the LEDs mount flush to the front of an enclosure.

bargraph_lift1

bargraph_lift2

The kit is easy to assemble and the instructions are complete and easy to follow. The resulting display has a nice look and is easily programmed to display a variety of patterns. The kit can be assembled in under an hour and assuming you have an Arduino laying around and some jumper wires you can be displaying blinky patterns in less than 15 minutes more.